
How to Make Your Own Omnitrix: A Step-by-Step DIY Guide for Builders and Cosplayers
Building your own Omnitrix replica brings the iconic alien device from fiction into your hands as a tangible project. Whether you’re preparing for a convention, creating a display piece, or simply want to engineer a working prop, the construction process rewards patience and attention to detail.
This guide walks through the materials, techniques, and assembly steps needed to make an Omnitrix that balances screen accuracy with practical wearability. We’ve refined these methods over hundreds of builds, and the approach works whether you’re laser-cutting acrylic or hand-shaping foam.
Choosing Your Construction Method and Materials
The first decision shapes every step that follows: foam and paint, 3D printing, or mixed-media layering. Foam builds suit first-timers because craft foam forgives mistakes and weighs almost nothing, making the finished piece comfortable for all-day wear. A cosplay build that needs to survive transport and crowds benefits from this flexibility.
3D Printing vs Hand-Fabrication
Printing delivers hard edges and mechanical detail that foam can’t match. If you have access to a printer, start with an existing STL file scaled to your wrist diameter, then modify the faceplate geometry in Tinkercad or Fusion 360. Our 3D printed Omnitrix resources include tested print settings and post-processing techniques that eliminate layer lines without hours of sanding. Hand-built alternatives using EVA foam sheets, Worbla thermoplastic, or laser-cut acrylic still achieve clean results when you template each part on paper first and transfer dimensions carefully.
Core Components: Faceplate, Band, and Electronics
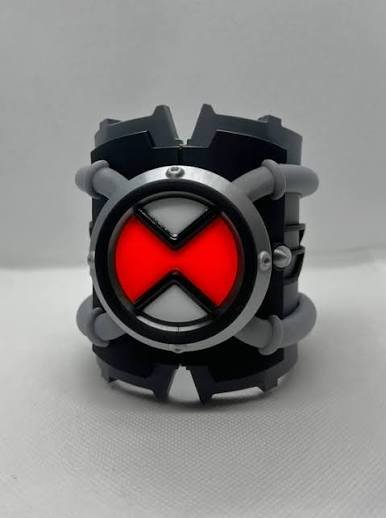
Every Omnitrix needs three functional layers. The faceplate houses the dial and any light or sound electronics; the wristband anchors the device and handles wear stress; the internal frame ties both together and creates the correct profile depth.
Faceplate Fabrication
Cut your faceplate from 3mm craft foam, sintra PVC, or printed ABS. The central dial recess should measure 45-50mm diameter for most adult builds. If you’re adding LED effects, drill or punch a center hole now before painting obscures your layout marks. Builders often ask whether the same techniques used in constructing functional watches apply here—the answer is partly yes: case-back attachment methods and bezel fitment logic transfer directly, though an Omnitrix faceplate sits proud of the wrist rather than flush.
Wristband Construction
Webbing straps with side-release buckles offer the fastest solution and survive convention wear better than elastic or velcro. Cut two 25cm lengths of 38mm nylon webbing, seal the ends with a flame, and sandwich each end between the faceplate’s mounting tabs using contact cement or E6000 adhesive. The toy-grade versions use injection-molded one-piece bands that can’t adjust, which is why nearly all DIY builds switch to strapping—it fits more wearers and allows quick removal.
Painting and Finishing for Screen Accuracy
Surface finish separates a recognizable prop from a convincing replica. Start with a primer layer—Plasti Dip for foam, filler primer for 3D prints—then build color in thin coats rather than one heavy application that obscures detail.
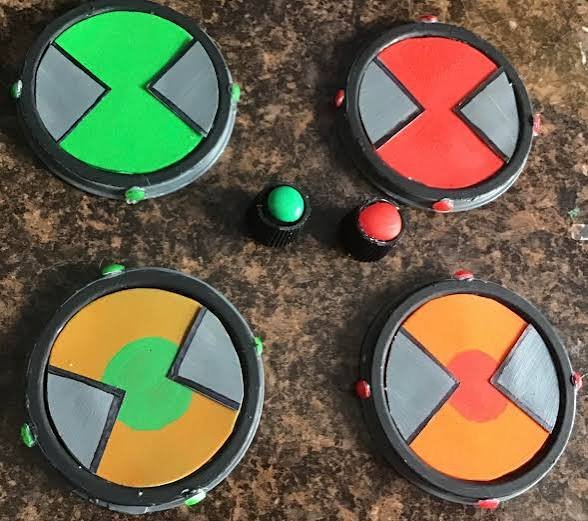
The original series Omnitrix uses a white faceplate with black accent lines and a green dial core. Mix your white with a drop of warm gray so it photographs neutrally under indoor light instead of cold blue. Mask the dial recess with vinyl or tape, spray two coats of satin white, let cure for four hours, then add black panel lines with a fine brush and thinned acrylic. If you’re replicating the Alien Force redesign, the faceplate shifts to gunmetal gray with silver highlights.
Clear Coating and Wear Protection
Seal everything with two coats of matte or satin clear—gloss reads as plastic toy rather than alien tech. For builds that will see heavy use, add a third coat to areas that contact skin or rub against costumes. Some builders compare these techniques to maintaining deluxe Omnitrix collectibles, which use similar protective layers to prevent paint rub on metal faceplates.
Adding Lights and Sound Effects
Electronics elevate a static prop into an interactive piece. The minimal viable circuit is a single green LED wired to a coin cell battery and a momentary push button hidden under the dial. Drill a small access hole in the back of the faceplate so you can swap the battery without disassembling the entire device.
LED Placement and Diffusion
Mount the LED directly behind the dial’s center or embed it in a ring if you want the entire faceplate to glow. Diffuse harsh point-source light by placing a disc of translucent craft foam or a layer of hot glue over the LED before installing the dial cap. For sound, an Adafruit Audio FX board loaded with transformation sound clips fits inside most builds if you extend the faceplate depth by 10mm. Wire a second button to trigger playback and hide a small 8-ohm speaker under the wristband. The Omnitrix FX line demonstrates how commercial products integrate sound into compact housings—study teardown photos to see component positioning before committing to your internal layout.

Assembly and Fit Testing
Join all parts with contact cement for foam builds or cyanoacrylate for rigid materials. Apply adhesive to both surfaces, let tack for 30 seconds, then press firmly and hold for one minute. Clamp curved sections with rubber bands or spring clamps while the bond cures.
Once assembled, wear the Omnitrix for 15 minutes and check for pressure points where the faceplate digs into your wrist or the band rides up your forearm. Sand or file any sharp edges now rather than discovering them mid-event. If the device rotates around your wrist, add a second retention strap above the main band or increase the band’s width to 50mm for better grip. Readers building multiple props often reference what is Omnitrix documentation to confirm which design generation they’re replicating, since fit and proportion shift between the original series, Alien Force, and Omniverse versions.
From Plans to Finished Replica
Building an Omnitrix tests your ability to translate flat reference images into a three-dimensional wearable device. The process teaches templating, symmetry, and finish work that transfer to any cosplay or prop project. Start with the simplest version that meets your needs—a foam faceplate and nylon strap—then add electronics and detail as your skills grow.
Every builder improves their technique with each iteration. Your first attempt will reveal which steps need more time and which materials suit your workflow. By the second build, you’ll cut cleaner lines, mix better paint ratios, and troubleshoot wiring faster. The finished piece becomes both a display item and a record of what you’ve learned.
Notes
Expect 8-12 hours for a basic foam build and 15-20 hours if you’re 3D printing, sanding, and adding electronics. Most builders spread the work over a weekend: day one for cutting and assembly, day two for painting and final details. Drying time between paint coats adds another 6-8 hours of passive waiting.
Achieving symmetry on the faceplate details challenges beginners more than any other step. The dial recess, button housings, and panel lines must align or the whole piece looks off-center. Use a compass and ruler to mark positions before cutting, and test-fit cardboard templates first. Electronics troubleshooting runs a close second—double-check polarity on every LED connection before sealing the faceplate.
Yes. A hand-built foam Omnitrix using craft foam, a hobby knife, and contact cement produces excellent results without any machinery. Cut templates from cardstock, trace them onto foam sheets, and assemble with patience. You won’t achieve the mechanical detail of a printed version, but the shape and wearability remain identical.
Install a small bearing or lazy-susan mechanism between the dial face and the faceplate. A 608 skateboard bearing works if you enlarge the center hole to 8mm and secure the bearing with epoxy. The dial cap then press-fits onto the bearing’s outer race and rotates freely. For a simpler non-spinning version, just glue the dial in place at the 12 o’clock position.
EVA craft foam remains the lightest option at roughly 50 grams for a complete build. Sintra PVC and laser-cut acrylic weigh about 120 grams, and 3D printed ABS or PLA reach 150-180 grams depending on infill percentage. If weight matters for extended wear, foam construction or hollow printed shells with 10 percent infill offer the best comfort.
Screen accuracy depends on reference images and your willingness to iterate. DIY builds can match or exceed official toy proportions because you control every dimension and can scale parts to your exact wrist size. Official replicas prioritize durability and child safety over detail, so custom builds often look more accurate in photos even if they use simpler materials.